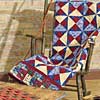
I saw this cool quilt on a website and thought I would share. I basically just copied and pasted and am not sure I totally get what she's done with the back of the quilt, but I thought you might enjoy this. I'm trying to decide if I want to do all of this work, but thought that it was a darling alternative to the traditional blue jean quilt. 
From Doreen
Bismark, North Dakota
I call this a Circle Jeans Quilt.
From the front it reminds me of a Cathedral Windows Quilt.
They are very easy to make. Here's how:
Using the lid off a coffee can (or any size plastic lid off any container, you can choose the size "squares" you want by the size of the "circle") cut out circles from old jeans. You can remove pockets and other obstructions that are in the way of your circle to get more fabric out of an old pair of jeans. This will give you a two-tone effect on that part of the fabric in the finished quilt.
Cut a piece of cardboard from a cereal or cracker box just slightly larger than would fit into the size of your circle. If you lay the square over the top of the circle you'll want the corners of the square to just peek out of the circle edge by about a 16th of an inch. If you have an ice cream bucket lid handy you can cut the square from it and have both your templates made out of plastic -- almost indestructible! If using the paperboard, you may have to redraw it if you're making lots of quilts because you'll gradually be wearing away your sharp edge as you draw around it.
I use an ink pen to trace around the shapes. I know this is a "no-no" in quilting, but I figure since it's already blue the blue jean fabric won't really be harmed by either blue or black ink and it shows up well on the dark blue.
After cutting out your circles you will draw a square onto the blue jean circle. This will be your sewing line. You need to align two blue jean circles, right sides together, so the squares line up. Sew along one side of the square. Open up and fingerpress or iron the flap seams open. I use regular dual-duty sewing thread and backstitch at both the starting and stopping edge of the seam. A heavy-duty thread might be good to use if you plan on lots of rough use.
Continue sewing circles together till you've created a chain then sew the chains together to make the piece as large as you want. I find it a little easier to work with if I create the quilt in "blocks" then sew my blocks together. Blocks could be any size you find comfortable to work with. As it gets larger it is a bit bulky to sew. Working in blocks to do the finishing work is easier.
You will need to use your square to also cut other complimentary fabrics to place inside the "windows". These can be all from one color (red goes well with blue jeans) or they can be an assortment of scraps you want to use up for a true "scrap quilt". Some thicker fabrics I find easier to work with if I trim just a tish off of two sides to make the square slightly smaller. (If you're stuffing your quilt at this stage you will definitely want to cut your squares a tish smaller - a second square template slightly smaller than the first one would be good to have for cutting these).
 To finish off you place the scrap fabric square within the "flaps" created on the back side of the jeans block. Fingerpress or iron the "flaps" down. Using a zig-zag stitch (set fairly close together) stitch along the curved edges of the "window". This will be like a machine applique effect and helps to reinforce the quilt to stand up to a lot of wear and tear. The most time efficient way to do this stitching is to zig-zag stitch in long wavy lines as the curves undulate the length of the block, then go back and zig-zag the curves across the width of the block. You will need to leave the outer edge of the block unfinished so you can sew all the blocks together, then go back and add the fabric squares and finish off these areas once all the blocks are together.
Alternative: It is possible to wait and sew all the square fabric pieces into the quilt at the end after you have assembled all the circles together, then top stitch the zig-zag curves all at one time. I find it too bulky to work this way in the cramped sewing area I have. If you've got lots of room to work though, this might be an option for you.
You might also want to bind the outer edge, I chose not to.
 I didn't add any batting in my quilt because I wanted a lighter weight summer quilt, but if you want extra warmth you could add batting scraps in under the fabric squares, or make a "puffy" quilt by stuffing with cotton balls or polyester.
The thing I like most with this quilt is that it is all machine finished. It's quick and easy with no hand quilting to it. You don't even have to take the time to "tie" it. It finishes itself -- and both sides look great.
My friend did hers with all red bandana squares and red applique thread in the bobbin case. It looked great with the red wavy lines on the jeans side! Mine is all scraps from different clothes the kids wore when they were little. It makes a nice memory quilt to think back to when they used to wear those clothes.
Hope you like this quilt, thanks for letting me share. The images I included were made by putting the blocks on a scanner.
Just for gee-whiz information the majority of the prints that showed in the front side of the scan were from fabric scraps my mom had given me a long time ago. I just wanted to use them up rather than throw out. They were pretty old pieces of fabric in this circle quilt. Most were from shirts my dad or my brothers wore when I was little. I'm 41 years old now, so those are pretty old now. It seems funny to look back on those old fabric designs.

 It may be another week before I'm far enough along post the finished quilt top. I really enjoy quilting but was feeling cluttered with my iron, ironing board, cutting mat, fabric and sewing machine all out. I put it all away and am excited to get some fresh air.


 To finish off you place the scrap fabric square within the "flaps" created on the back side of the jeans block. Fingerpress or iron the "flaps" down. Using a zig-zag stitch (set fairly close together) stitch along the curved edges of the "window". This will be like a machine applique effect and helps to reinforce the quilt to stand up to a lot of wear and tear. The most time efficient way to do this stitching is to zig-zag stitch in long wavy lines as the curves undulate the length of the block, then go back and zig-zag the curves across the width of the block. You will need to leave the outer edge of the block unfinished so you can sew all the blocks together, then go back and add the fabric squares and finish off these areas once all the blocks are together.
 I didn't add any batting in my quilt because I wanted a lighter weight summer quilt, but if you want extra warmth you could add batting scraps in under the fabric squares, or make a "puffy" quilt by stuffing with cotton balls or polyester.


